It is important that your Dash Camera is fitted, installed and setup correctly and not obstructing your view of the road.When done properly it can be left alone to capture footage as you drive, without the need to continually adjust or reposition the camera.If your Dash Camera isn’t fitted properly, you may not get the footage you need in the event of an incident or accident.
This guide will help make sure you get yours set up right the first time.
Where to mount your dash cam?
Unlike other hands free devices in the car, you cannot just stick the Dash Camera wherever you think works best.
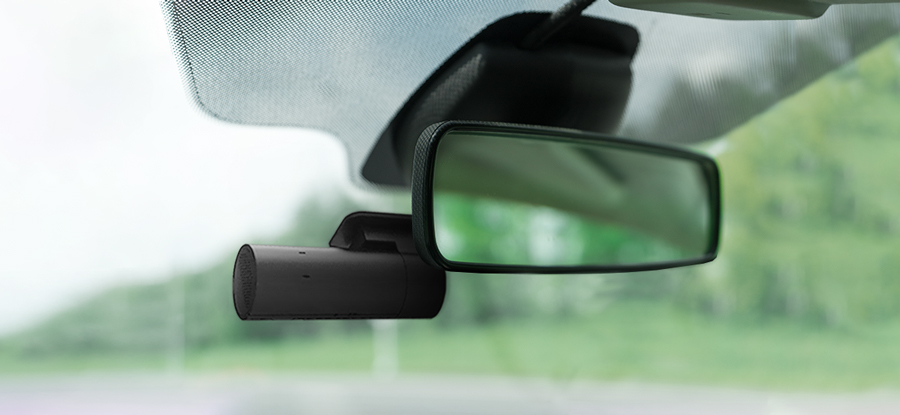
A Dash Camera must be fitted behind the rear-view mirror so it’s in the centre of your windscreen, but not obstructing your line of sight. This ensures it will capture both lanes of the road ahead, along with the road/street signage on either side.
Take you Dash Camera and included Mount and examine where the best place behind your rear-view mirror it best fits, once you have the right position mount it firmly in place using the suction or adhesive mount as provided with your Dash Camera.
Your Dash Camera will also come with a power lead which will need to be installed, you can tuck it around the edge of your windscreen before trailing it to the cigarette lighter.
Make sure you don’t simply plug it in directly, leaving the cable hanging down and getting in the way as this can be a distraction while driving and potentially cause you have an accident.
Test First
We strongly suggest that you test the Dash Camera once you have completed the initial installation as this will enable you to check the footage making sure that the Dash Camera is in the ideal position to get the best footage from the road as possible.
Once you have completed a couple of test runs and reviewed the footage, make any final adjustments to the Dash Camera mounting position. You may also make any internal settings changes if required, once completed you are now ready to enjoy your driving with the added peace of mind that you footage will be recorded and saved in the event of an incident or accident.
Hardwire Kit Installation
Your Dash Camera can be professionally fitted with an optional Hardwire Installation Kit.
The Hardwire Installation Kit involves connecting your Dash Camera directly to your vehicles on-board electricals via the fuse box. Installation is fairly simple for those who are confident in this area, total installation should take no longer than 30 minutes.
Once installed the Dash Camera will switch ON and Off automatically with your vehicle’s ignition, all the wires are hidden out of sight under your dashboard and also frees up the cigarette lighter for other uses. To find out more about our Nanocamplus Hardwire Installation Kit please click here.